
New Upper Chain Guide (24 Mar 2017)
I have several U20's and had a few upper chain guides, but since this is for the 67 2000 I decided to buy a new one. If the guide is not worn or does not have deep grooves or dry material they are reusable, but as I was insatlling new Heavy Duty chains by Jim Tyler I wanted a new thick guide with zero wear.
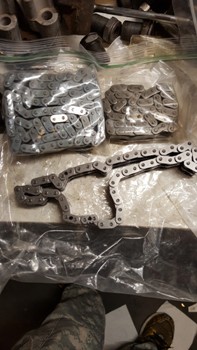
New Heavy Duty Chains (24 Mar 2017)
I had NOS Datsun chains on hand, but I have been buying lots of parts from Jim Tyler as he makes high quality replacement parts for Datsuns. Jim offers Heavy Duty replacement upper and lower chain and all gears and sprockets. This is one of the largest cost areas of a U20 rebuild, but with after market replacements and high quality you can rebuild a U20's entire timing set for a very resonable cost. You can really feel the difference between his chain and an original when you have the two side by side.


Evil L (24 Mar 2017)
One of the issues with the U20 design is if you have loose or worn chains or poor oil pressure the upper chain will hit the service gear bracket installed on the upper guide. Owners use shims to tighten the chain tensioners or cut the evil L off completely. I like the upper gear bracket as a holder so I made a removable L that fit on all of my upper chain guides. I simply copied the patern on the new bracket and cut the Evil L off.
Modified Upper Guide (24 Mar 2017)
Original L on left and the removable piece that sits in the slot on the right.
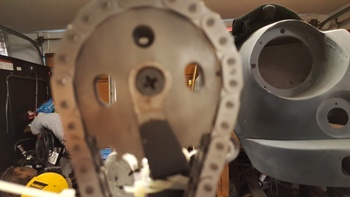
Upper Chain Guide On (25 Mar 2017)
The upper chain guide bolts on and has a simple lock plate to bend the corners over the edge of the retaining bolts.
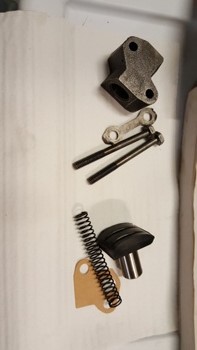
Front End Parts (6 Apr 2007)
Lower Chain Tensioner. I bought a new tensioner foot, but reused the tensioner housing.

Upper Chain (25 Mar 2017)
The upper chain is pretty simple as the rear jackshaft sprocket and upper cam gear have dimples that simply align to marks on the chain (installed with engine at #1 TDC). Since the cam gear is mounted on the evil L during assemble it moves easily. Since I was doing so much work on this engine I bought one of JT's adjustable cam sprockets. He has several versions available. It's just another GREAT product that provides some adjustability to your cam timing.
Front Jackshaft Sprocket (25 Mar 2017)
Nothing to the front gear as the jackshaft and gear have a keyway so the gear only goes on in one position.

Crankshaft Gear (25 Mar 2017)
With the engine still at #1 TDC, I installed the Crank gear. I have ziptied my upper chain to its gear as the bottom can droop off of the inside jackshaft gear, if the chain is even off by one tooth there will be issues with the complete system.
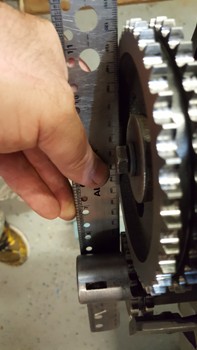
Gear Alignment (25 Mar 2017)
Since my gears were new I needed to test for alignment. You simply place a straight edge between the two lower chain gears and measure the void with a feeler gauge. You can actually see the gap between the bottom gear and the straight edge.
Shims (25 Mar 2017)
To align the gears you simply install shims behind the crank sprocket to move the gear forward.
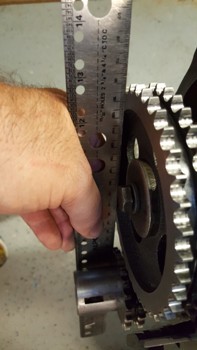
Recheck Gear Alignment (25 Mar 2017)
Rechecked with straightedge and you can see the gears are now aligned with no gaps..


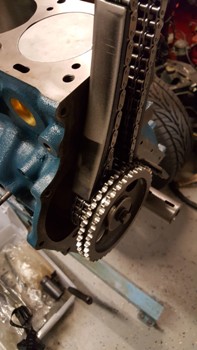
Lower Chain (25 Mar 2017)
With the engine still at TDC the lower chain installs on its gears with the chain marks aligned to the gear dimples..
Lower Chain Aligned (25 Mar 2017)
To ensure the chains are correct you turn the crank and the lower gears will align in what is described as a checking position. All of the install steps are clearly descibed in Scotts Datsun Roadster Volumes.

Chains Complete (25 Mar 2017)
All of the chain timing checks out so the final step before working the front cover and checking that the crank dampner timing mark matches I needed to button up the final steps. I installed the lower tensioner and put the oil slinger on the crank nose.
Cam Sprocket (25 Mar 2017)
You can clearly see the adjustable slots on JT Cam Sprocket and the beautiful chains that are so smooth.